Get Quote
Home > News > Fan Knowledge Sharing > DC Axial Fan Troubleshooting Tips
DC Axial Fan Troubleshooting Tips

DC Axial Fan Troubleshooting Tips

SEPTEMBER 16, 2026

Table of Contents

  1. Introduction

  2. Most Common DC Axial Fan Failure Modes

  3. Power and Wiring Troubleshooting

  4. Diagnosing Bearing Wear and Noise

  5. Impeller Inspection: Dust, Damage, and Balance

  6. Why Airflow Is Low: Tracing the Real Cause

  7. Controller and Speed Signal Problems

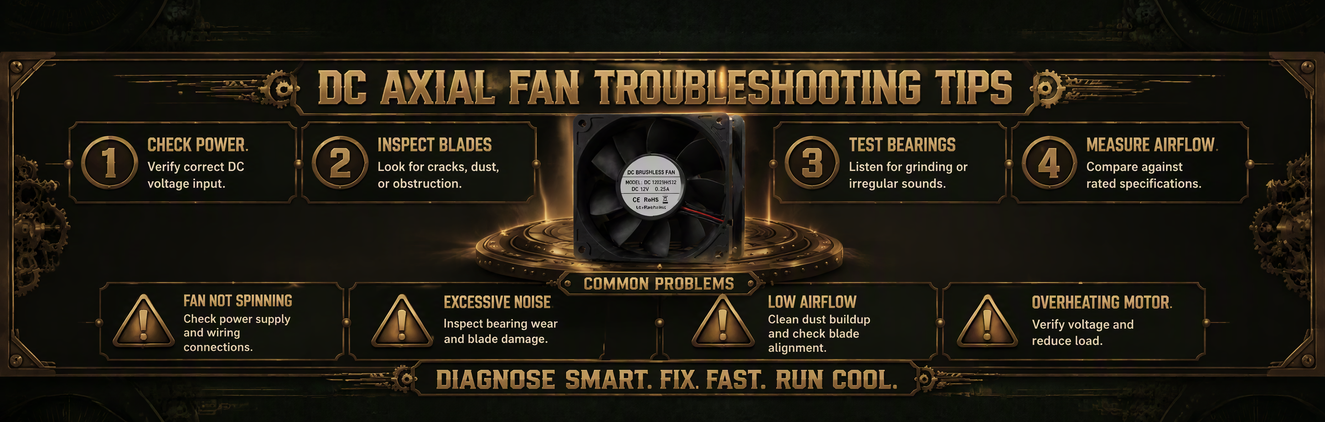
  8. Practical Six-Step Troubleshooting Sequence

  9. Summary

  10. Frequently Asked Questions

  11. References

1.Introduction

DC axial fans are everywhere: power supplies, laptop cooling, server racks, LED drivers, 3D printers, and countless other electronics enclosures. They are small, cheap, and easy to replace. But "just swap the fan" is not always the right answer. If you replace a fan and the new one fails the same way, you have treated a symptom instead of a cause [1].

The good news is that most DC axial fan problems can be diagnosed in ten minutes with tools you already own: a multimeter, a small screwdriver, and a can of compressed air. This guide walks through the most common failure modes, what causes them, and how to fix them properly. It is written for engineers, technicians, and hobbyists who want to stop throwing good fans at bad installations [2].

2.Most Common DC Axial Fan Failure Modes

DC Axial Fan Troubleshooting Tips

Figure 1: Most common failure modes reported for small DC axial fans in field returns. Bearing failure and dust accumulation together account for over half of all failures.

Manufacturer field data from ebm-papst, Sanyo Denki, and Sunon shows a consistent pattern in failed DC axial fan returns. Six failure modes cover the overwhelming majority of cases [1] [2] [7].

The big six:

Bearing failure — Rough rotation, grinding noise, seized rotor; caused by wear, contamination, or heat
Dust accumulation — Airflow drops as dust packs onto blades and into the hub
Cable or wiring damage — Frayed leads, pulled solder joints, or broken connectors
Controller board issues — Failed Hall sensors or driver ICs on the motor PCB
Impeller damage — Cracked, chipped, or warped blades from mishandling or foreign objects
Connector corrosion — Oxidized pins from humidity or harsh environments cause intermittent operation

Notice what is almost never the cause: the motor windings themselves. Brushless DC fans are extremely reliable electrically, with MTBF ratings typically above 70,000 hours at rated temperature [2] [6]. If a fan stops spinning entirely, suspect the driver, the connector, or the bearings before assuming the winding burned out [6].

3. Power and Wiring Troubleshooting

The first rule of DC fan troubleshooting: check the power before you check the fan. A fan that "died" is often running on a supply voltage that collapsed under load, or a connector that looks fine but carries no current [3].

Step 1: Measure the supply voltage at the connector

Set your multimeter to DC volts and measure across the fan power pins while the fan should be running. A 12V fan needs at least 10.8V at the pins to start reliably and run at full speed. If the voltage reads 12V with the fan unplugged but drops below 9V with the fan connected, the power supply is overloaded or the wiring is too thin. This is a common problem when several fans are daisy-chained off one supply rail [3].
Step 2: Check the connector

Intermittent operation is almost always a connector, not a fan, problem. Wiggle the connector while the fan runs; if the fan stutters, the pins are loose or corroded. In humid environments, connector pins oxidize and develop high resistance that heats up. Clean the pins with contact cleaner and, if the housing is damaged, replace the connector rather than the fan [2].

Step 3: Check for voltage polarity and brownout

DC fans are reverse-polarity protected in most cases, but if the polarity is wrong the fan will sit dead surrounded by smoke. Verify red-to-positive, black-to-negative. Also watch for brownout: if the supply voltage slowly sags under load, the fan may spin slowly, hunt, or refuse to start at all [3].

4. Diagnosing Bearing Wear and Noise

DC Axial Fan Troubleshooting Tips

Figure 2: Bearing wear progression in a DC axial fan. Vibration and noise stay low through normal operation, rise gradually as wear develops, and climb sharply as the bearing approaches end of life.

Bearings are the most heavily loaded mechanical parts in a DC axial fan and the first thing to fail in normal service. Small fans use two main bearing types: sleeve bearings and ball bearings. Each has its own wear signature [7].

Sleeve bearing wear:

Sleeve bearings run a rotating shaft inside a porous bronze bushing soaked in oil. As the oil migrates or dries out, the shaft starts making metal-on-metal contact. The classic symptom is a squealing or scratching sound that disappears for a few seconds after the fan spins up, then returns. Re-oiling an oil-starved sleeve bearing can buy a few weeks, but the fan should be replaced [7].

Ball bearing wear:

Ball bearings fail with a distinctive grinding or rattling sound. If the fan is disassembled, you will see pitting on the raceways and balls. Ball bearings last longer than sleeve bearings (typically 40,000+ hours versus 20,000-25,000 hours), but they are noisier when new and produce sharp vibration when they wear [1].

The relationship between temperature and bearing life is severe. Every 15 degrees Celsius above 40 degrees roughly halves lubricant life, a relationship documented in bearing datasheets [2] [7]. A fan that runs hot because of a restricted vent will eat its bearings in months, not years.

Quick bearing test:

Unplug the fan and spin the impeller by hand with a sharp flick. A healthy fan rotates smoothly for two or more full turns. A worn bearing stops abruptly, feels gritty, or makes a scraping sound. This ten-second test classifies the fan immediately [1].

5. Impeller Inspection: Dust, Damage, and Balance

DC Axial Fan Troubleshooting Tips

Figure 3: Impeller inspection guide. Dust-loaded blades can lose 20% or more of rated airflow, while a broken or missing blade causes vibration and unbalanced operation.

Dust is the silent killer of DC axial fans. A fan can look healthy while a packed layer of dust on the blade surfaces cuts airflow 20-40% at roughly the same motor power, while the dust also insulates the bearing area and traps heat [1].

Blades accumulate dust most heavily near the hub and on the low-pressure side of the blade. Clean with a soft brush and low-pressure compressed air, blowing from the intake side. For heavy buildup, a cotton swab dampened with isopropyl alcohol removes stubborn grease-dust mixtures. Avoid spinning the fan with compressed air from an air nozzle aimed at the blade tips, since high-speed free-spinning can damage the bearings [4].

What about blade damage?

A cracked or missing blade is a different story. The impeller becomes massively unbalanced, producing vibration that beats the bearings to death and generates audible whooshing noise. If you see chips, cracks, or warping, replace the fan or impeller assembly. Do not attempt to glue or balance a damaged plastic impeller; it will fail again and the debris can damage the enclosure electronics [1].

Also verify blade-to-housing clearance. Fans installed in a slightly distorted housing, or with the mounting screws over-tightened, can let the blade tips rub against the frame, wearing down the blades and producing a scraping noise that sounds like bearing failure [7].

6. Why Airflow Is Low: Tracing the Real Cause

DC Axial Fan Troubleshooting Tips

Figure 4: Most common causes of reduced airflow in DC axial fan installations. Blocked vents and dust account for half of all low-airflow complaints.

A DC axial fan is a pressure-generating device with very limited static pressure capability. Even a small obstruction in the airflow path cuts performance far more than most people expect. AMCA Standard 210 defines the accepted test procedures for measuring fan performance, and the data shows axial fans lose airflow dramatically as system resistance rises [4]. ASHRAE ventilation guidance applies the same

 reasoning: enclosure airflow is a system problem, and the fan is only one component in it [5].

Check these in order:

Blocked vent/grille — Dust or labels covering the intake or exhaust cut airflow 30-50%
Obstructed intake path — Fans mounted flush against a flat surface with no standoff can draw only a fraction of rated airflow
Dirty impeller — See the previous section; blade buildup silently reduces output
Wrong rotation direction — If the fan pushes air the wrong way, airflow in the enclosure collapses even though the fan spins
Controller set too low — The fan may be running at reduced speed due to a PWM input stuck at a low duty cycle

One subtle check: a DC axial fan mounted too tight against a wall of the enclosure starves itself. The inlet needs a clear approach path of roughly one fan diameter. If you must mount close to a surface, use a fan shroud or spacer that provides a clean inlet transition [1].

A quick bench check settles it: run the fan at rated voltage from a bench supply and compare airflow against a known-good identical fan with a handheld anemometer. If they match, the fan is fine and the installation is the issue [4].

7. Controller and Speed Signal Problems

Modern DC axial fans are four-wire devices in most professional applications: VCC, GND, a PWM speed control line, and a tachometer (speed feedback) output. Faults in the control wiring produce symptoms that look exactly like fan failure [2].

PWM line problems:

If the PWM line is left floating, poorly driven, or pulled to an unexpected level, the fan may run at a fixed reduced speed regardless of what you send it. Some fans fall back to a default 50% duty when the PWM pin is undriven; others default to full speed. Check that the PWM signal swings cleanly from near 0V to near the PWM high level (typically 3.3V or 5V) and that the frequency matches the fan specification (usually 25 kHz) [2].

Tachometer output problems:

No tach signal almost always means the fan is not rotating, but it can also mean the tach line is shorted, the pull-up resistor is missing, or the connector pin has a cold solder joint. Measure the tach pin with an oscilloscope or a multimeter set to frequency counting while the fan spins [3].

On fans with locked-rotor protection, a mechanical jam triggers the driver to shut down and periodically retry. A fan that "wakes up and stops, wakes up and stops" in sync with a stuck impeller or foreign object is not an electrical failure: remove the obstruction [1].

8. Practical Six-Step Troubleshooting Sequence

DC Axial Fan Troubleshooting Tips

Figure 5: Recommended six-step troubleshooting sequence for DC axial fans. The entire diagnosis takes about 45-60 minutes and requires no specialized tools beyond a multimeter.

When you have a suspect fan, work through this sequence instead of grabbing a replacement immediately. It takes less than an hour and frequently saves the fan [1] [2].

Step 1: Confirm the symptom (5 min)Is the fan dead, noisy, running slow, or moving no air? Run it in place and note what you hear and see. A fan that spins but moves no air is a very different problem from a fan that does not spin [2].
Step 2: Power and wiring check (10 min)
Measure voltage at the connector with the fan running. Check polarity, connector condition, and supply sag under load. Inspect the cable for pinches, fraying, or pulled wires at the strain relief [3].
Step 3: Visual inspection (10 min)
Remove the fan and inspect the impeller for dust, damage, and tip rubbing. Check the mounting: bent housing, over-tightened screws, or a blocked vent nearby. Clean the blades with brush and compressed air [4].
Step 4: Performance test (15 min)
Run the fan at rated voltage on the bench. Compare airflow by feel or anemometer against a known-good fan. Verify speed control and tach lines if present [4].
Step 5: Bearing assessment (15 min)
Spin the impeller by hand and listen for grinding or roughness. If the fan is sleeve-bearing and only marginally noisy, replacement is cheaper than re-oiling. If it is ball-bearing, premature wear at low hours indicates a root cause like heat or contamination in the installation [7].
Step 6: Decide and fix the installation, not just the fan (rest)

If the fan failed young, ask why. Restricted airflow, high ambient temperature, or power supply problems will kill the replacement just as fast. Fix the root cause first, then install the new fan [1].

9. Summary

DC axial fan troubleshooting is mostly a matter of checking the obvious things in a sensible order. Measure the supply voltage before you condemn the motor. Spin the impeller by hand before you condemn the bearing. Clean the blades and check the airflow path before you buy a replacement. Field data shows that bearings, dust, and wiring issues cause the vast majority of failures, not the motor electronics themselves.

The six-step sequence in this guide converts a vague "fan is broken" report into a specific diagnosis in under an hour. And when the diagnosis does point to bearing wear or impeller damage, remember the root-cause question: why did it wear out early? A hot, dusty, or power-starved installation will destroy a new fan exactly the same way it destroyed the old one. Fix the installation, and the replacement fan will last its full rated life.

10. Frequently Asked Questions

Q1: My DC fan spins but pushes very little air. Is the fan bad?

Usually not. A spinning fan that delivers little airflow points to a blocked inlet or exhaust, dust on the blades, or the fan running at a reduced speed from a low PWM duty cycle. Check the vent and grille first, then clean the impeller, then verify the PWM input. Only after ruling out these should you suspect the fan itself. A quick bench test at rated voltage with a known-good fan is a reliable way to confirm [4].

Q2: How do I tell if a DC fan is sleeve-bearing or ball-bearing?

Check the datasheet or the label on the fan. Visually, ball-bearing fans often have a small visible clip or snap ring on the hub area, and they spin longer by hand when flicked. Physically, ball-bearing fans are heavier and produce a slightly different, crisp rotational sound when the impeller is spun by hand. Sleeve bearings squeal or whine when they start to fail; ball bearings grind or ratchet [7].

Q3: Can I fix a noisy DC fan by oiling the bearing?

Temporarily, sometimes, for sleeve bearings. If the fan spins quietly for a few seconds after a drop of light machine oil, the oil had dried out. But the repair is short-lived: the porosity of the bushing and the wear already done mean the fan will be noisy again within weeks. Given that replacement fans cost a few dollars, replacement is the practical answer for anything but a temporary keeps-you-going fix. Ball bearings that are grinding cannot be repaired by oiling at all [1] [7].

Q4: Why does my fan start, stop, then start again in a loop?

This is the classic locked-rotor protection cycle. The fan's driver IC senses that the rotor is not turning, shuts down for a few seconds, then tries again. The usual causes: a foreign object jamming the impeller, a failed controller, or occasionally a mechanical issue like a seized bearing that prevents startup. Remove the fan, spin the impeller by hand, and check what causes the jam. If the impeller spins freely and the fan still cycles, the driver board is at fault and the fan should be replaced [2].

Q5: Can I run a DC fan on a lower voltage to make it quieter?

Yes, but there is a better way. You can run a 12V fan at 9V, and it will be quieter at the cost of airflow and efficiency. However, most DC axial fans now support PWM speed control, which reduces the on-time of the full voltage instead of lowering the voltage itself. PWM keeps the motor's commutation healthy across the full speed range, produces linear speed response, and wastes less power as heat in the motor driver, matching the Energy Star guidance to run cooling only as fast as the thermal load demands [8]. Unless your fan is a fixed two-wire model, use PWM rather than undervolting [2] [3] [8].

11. References

[1] ebm-papst Group. DC Axial Fan Application and Service Guide: Failure Analysis and Bearing Replacement. Available at: https://www.ebm-papst.com.cn/en/
[2] Sanyo Denki. Sanace DC Fan Series: Technical Specifications, PWM Control and Field Return Data. Available at: https://products.sanyodenki.com/en/sanace/
[3] IEEE. IEEE Std 3001.8: Recommended Practice for Conducting Motor Field Tests and Diagnostics. Available at: https://standards.ieee.org/
[4] AMCA International. AMCA Standard 210: Laboratory Methods of Testing Fans for Ratings. Available at: https://amca.org/
[5] ASHRAE. Ventilation and Airflow Handling Best Practices for Equipment Enclosures. Available at: https://www.ashrae.org/
[6] U.S. Department of Energy. Motor Systems Efficiency and Predictive Maintenance Resources. Available at: https://www.energy.gov/eere/amo/motor-systems
[7] Sunon. DC Fan Bearing Technology Guide: Sleeve vs Ball Bearing Life, Lubrication and Wear Characteristics. Available at: https://www.sunon.com/en/
[8] Energy Star. Energy Efficiency Guidance for Electronics Cooling and Enclosure Ventilation. Available at: https://www.energystar.gov/